
Workspace tour
Find your way around the editor: menus, the toolbar, the canvas, the properties sidebar and the phone layout.
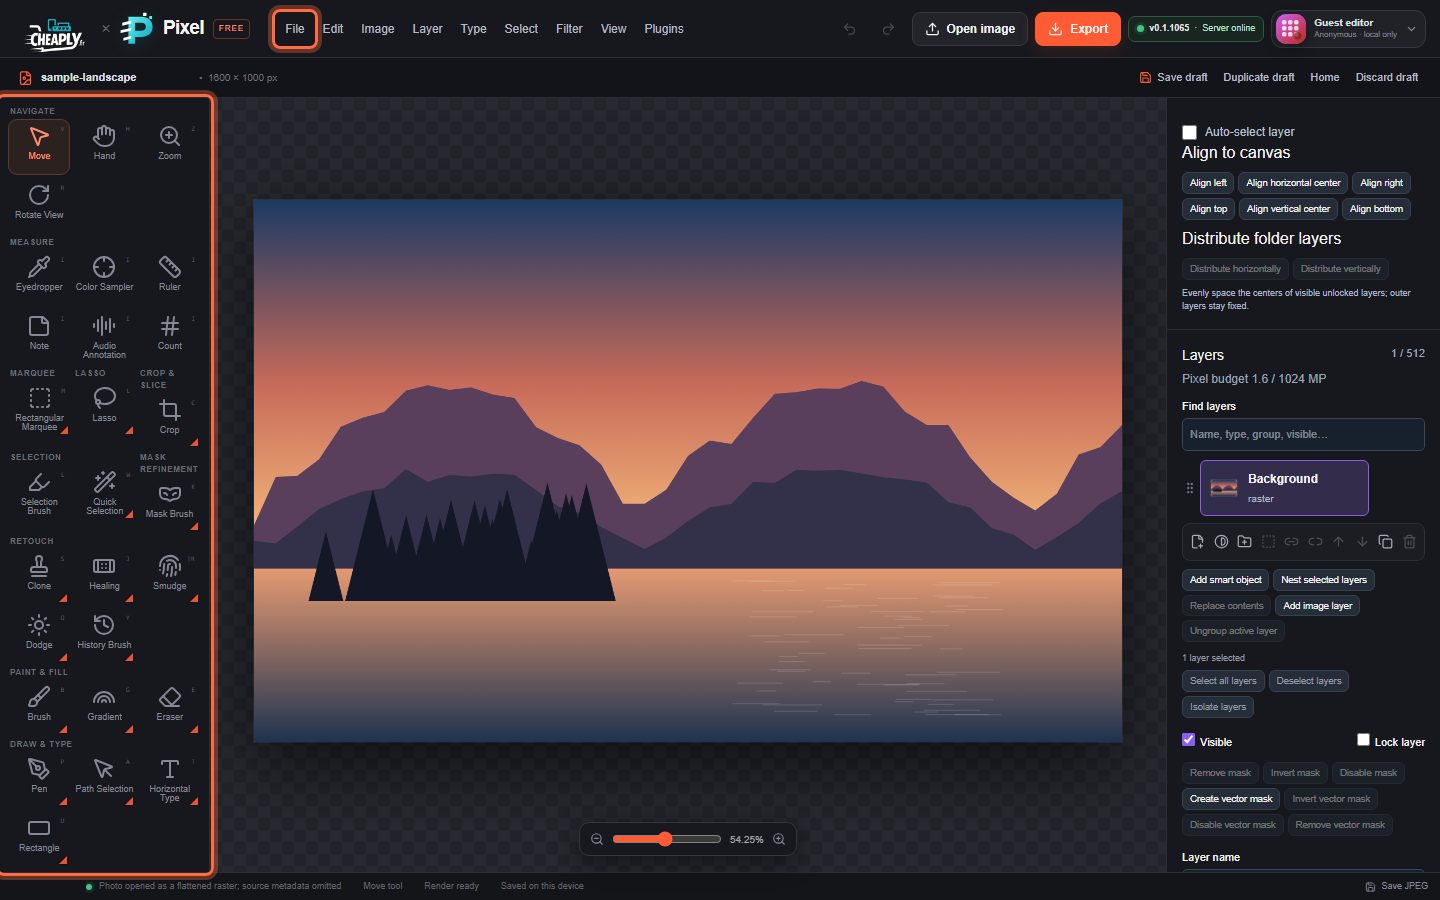
The editor has four main areas. The menu bar runs across the top, the toolbar sits on the left, the canvas is in the middle and the properties sidebar is on the right.
#Menu bar
The menus hold every command, grouped as File, Edit, Image, Layer, Type, Select, Filter and View. Commands that need a choice from you end with an ellipsis (…) and open a dialog first.
#Toolbar
Each toolbar button is a tool family. Click a button to use its current tool. Press and hold it, or right-click it, to choose another tool from the same family. Tools have single-letter keyboard shortcuts. Press the same letter again to move to the next tool in the family, or hold Shift to go back. See Keyboard shortcuts.
#Canvas
The canvas shows your document. Scroll to pan. Hold Ctrl (⌘ on Mac) and scroll, or pinch on a trackpad, to zoom around the pointer. The zoom slider at the bottom of the canvas and the View menu also change the zoom. On a touch screen, pinch with two fingers to zoom and drag with two fingers to pan (see Zoom, pan and rotate the view).
#Properties sidebar
The sidebar shows the options for the active tool and the Layers panel. Less common panels, such as History, Filters and Layer styles, are under More panels.
#On a phone
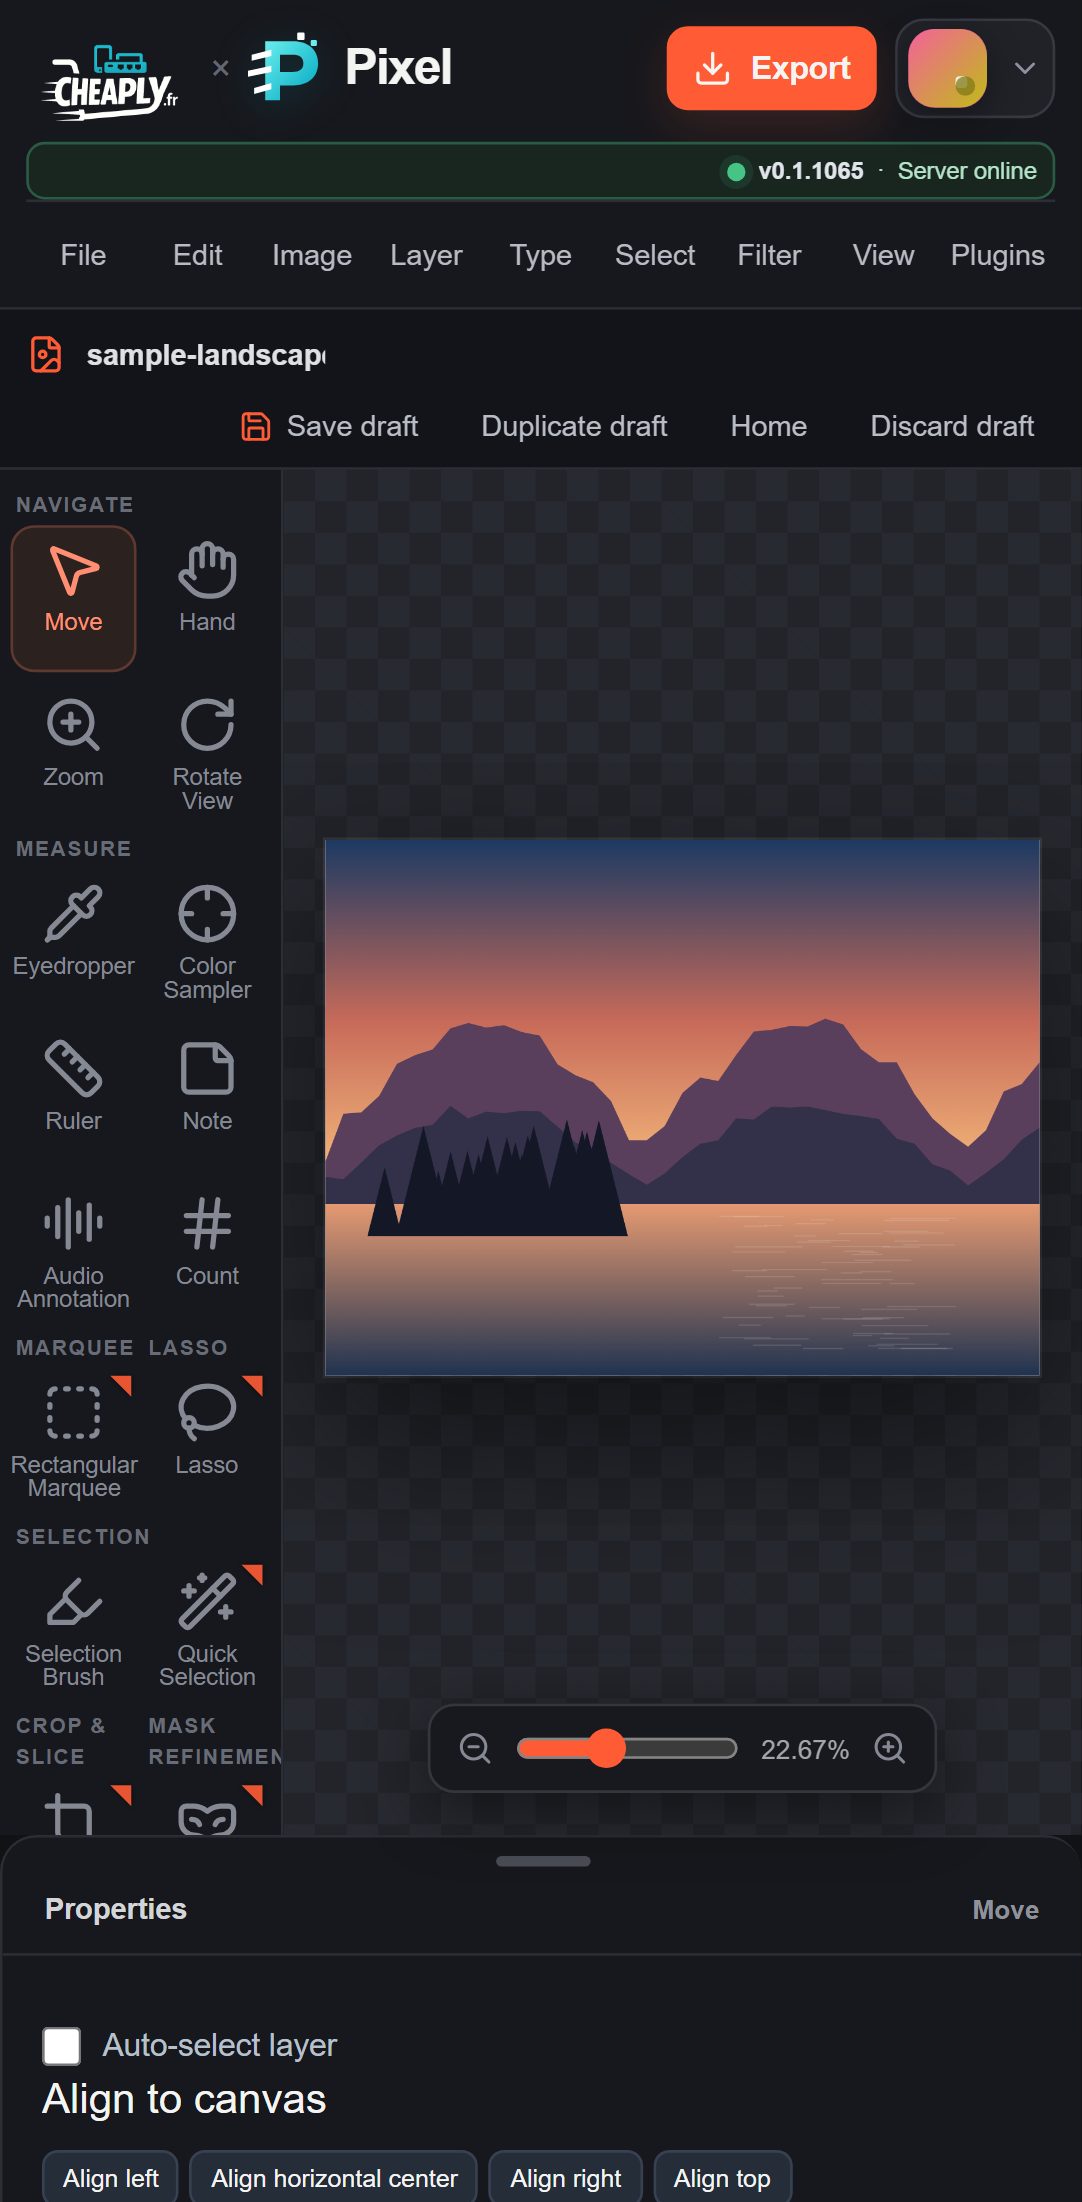
On a phone, the menus sit in one row under the top bar, the toolbar stays on the left as a scrolling column and the properties sidebar becomes a sheet at the bottom of the screen. See Using PixelForge on a phone.
Still stuck? See Troubleshooting or report a problem.