
Lens Flare
Add a camera-style flare with a glow, a star streak and coloured ghost rings using Filter > Render > Lens Flare…, on the photo or on its own empty layer.
Filter > Render > Lens Flare… adds the kind of flare you see when a camera points towards a bright light: a glowing core, a ring, a thin star streak and four coloured "ghost" circles along the streak. It is a live filter, so you can move and restyle the flare at any time. It is a drawn approximation; it does not model a particular lens.
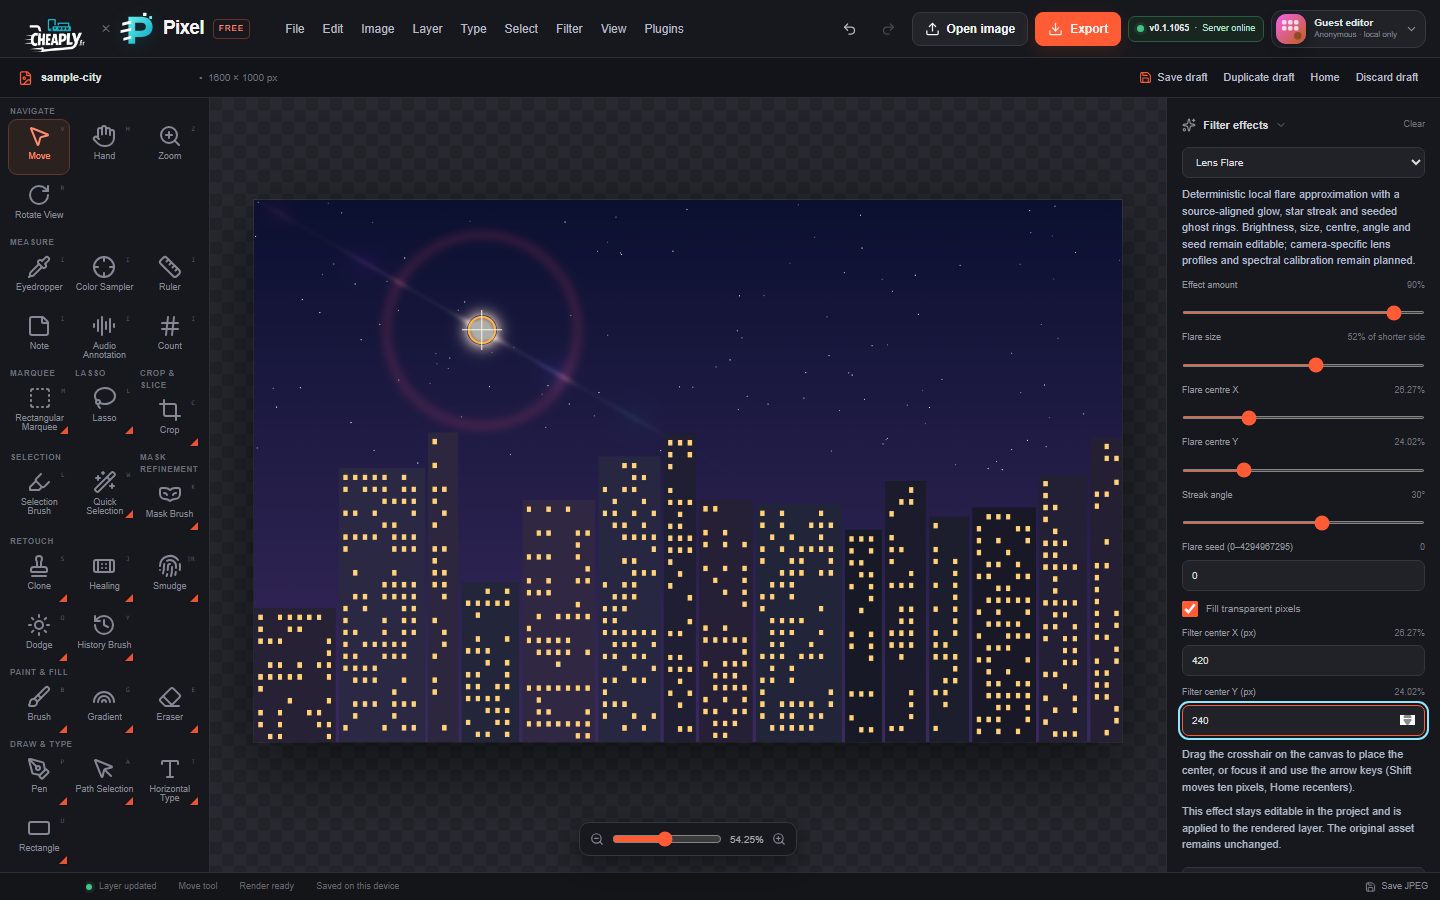
#Add a lens flare
- Select a layer. To keep the flare separate, add a new empty layer above your photo; new flares fill transparent pixels, so they show on an empty layer.
- Choose Filter > Render > Lens Flare….
- Open the Filters panel to see the settings in Filter effects.
- Drag the crosshair on the canvas to the light source, or type the position in Filter center X (px) and Filter center Y (px).
- Adjust size, brightness and angle.
#Options
| Option | Range | Default | What it does |
|---|---|---|---|
| Effect amount | 0–100 % | 75 % | Brightness of the flare. |
| Flare size | 1–92 % of shorter side | 52 % | Size of the flare, as a share of the layer's shorter side. |
| Flare centre X / Flare centre Y | 0–100 % | 50 % | Position of the flare's core. |
| Streak angle | −180° to 180° | 0° | Direction of the star streak. The ghost circles line up along the same direction. |
| Flare seed | 0–4294967295 | 0 | Picks a different colour and ghost layout. |
| Fill transparent pixels | on/off | on | Lets the flare's light fill empty pixels, so the flare works on its own layer. On opaque pixels it changes nothing. |
On opaque pixels the flare's light is added to the picture, so it only brightens.
Still stuck? See Troubleshooting or report a problem.