
The Layers panel
Learn what each part of the Layers panel does, from the layer list and its row menu to the layer actions, visibility, lock, name, opacity and blend mode.
A PixelForge document is a stack of layers. The Layers panel, always shown in the properties sidebar on the right, lists that stack and holds the controls for the selected layer. On a phone, it is in the properties sheet at the bottom of the screen.
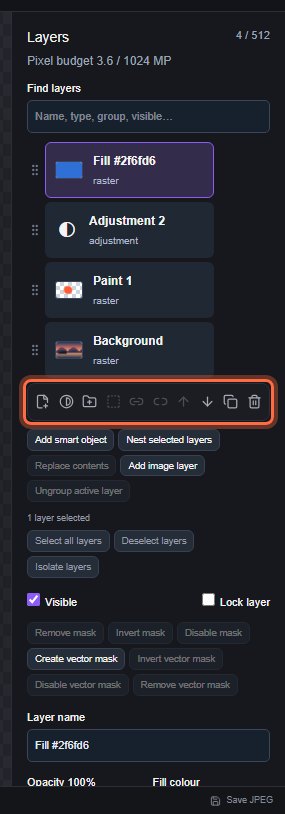
#Read the layer list
The list shows the stack from the top down: the first row is the layer drawn on top of everything else. Each row shows:
- a small thumbnail of the layer's own pixels for image and paint layers, or a symbol for other kinds (T for text, ◐ for an adjustment layer, and so on);
- the layer name;
- the layer type (for example "raster", "text" or "adjustment"), followed by "· locked", "· hidden" or the folder name when they apply.
The heading shows how many layers the document has out of the maximum of 512, for example Layers 4 / 512. Below it, Pixel budget shows how much of the shared memory budget for image layers is in use. See Large documents if you get close to the limit.
Click a row to select that layer. The selected layer is the one that painting tools, filters and adjustments work on. To select several layers, see Find and select layers.
#Use the row menu
Each row has a ⋯ button (shown when you point at the row on a computer, always shown on touch screens) and a trash button that deletes the layer. To open the row menu, click ⋯, right-click the row, long-press the row on a touch screen, or press Shift+F10 while the row has keyboard focus.
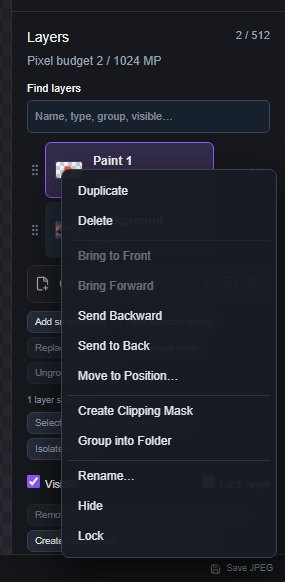
The menu holds Duplicate, Delete, Bring to Front, Bring Forward, Send Backward, Send to Back, Move to Position…, Create Clipping Mask (or Release Clipping Mask), Group into Folder, Rename…, Hide (or Show) and Lock (or Unlock). When the row is part of a multi-layer selection, the commands apply to every selected layer.
#Layer actions
The row of icon buttons under the list holds the everyday commands. Point at a button to see its name.
| Button | What it does |
|---|---|
| Add paint layer | Adds an empty paint layer above the selected layer and switches to the Brush. |
| Add adjustment layer | Adds an adjustment layer. |
| Group active layer | Puts the selected layers into a new folder. See Layer groups. |
| Mask from selection | Turns the current selection into a layer mask. |
| Create clipping mask / Release clipping mask | Clips the layer to the layer below, or releases it. See Clipping masks. |
| Raise layer / Lower layer | Moves the selected layer one step up or down. |
| Duplicate layer | Copies the selected layers. |
| Delete layer | Deletes the selected layers. Undo brings them back. |
Under the icons are text buttons: Add smart object, Nest selected layers and Replace contents for smart objects, Add image layer to place an image file as a new layer, and Ungroup active layer. The selection bar below them shows how many layers are selected, with Select all layers, Deselect layers and Isolate layers.
#Properties of the selected layer
Further down, the panel shows the settings of the selected layer:
- Visible shows or hides the layer. Hidden layers are not exported.
- Lock layer protects the layer from changes. See Link and lock layers.
- The mask buttons (Remove mask, Invert mask, Disable mask and the vector mask buttons) manage the layer's masks. See Layer masks and Vector masks.
- Layer name renames the layer. Layer > Rename Layer… jumps to this field.
- Opacity and Blend mode set how the layer mixes with the layers below. See Blend modes and opacity.
Text, shape and path layers show extra fields here for their content, and a Rasterize layer button to turn them into pixels.
#More layer panels
Some layer settings are in panels under More panels at the bottom of the sidebar:
- Details (Layer details): the Layer folder list, the Bring to front, Bring forward, Send backward and Send to back buttons, and the Layer X and Layer Y position in pixels.
- Styles (Layer styles): drop shadow, glow, bevel, outline and overlays. See Layer styles.
- Adjust (Adjust selected layer): tone and colour adjustments. See Adjustments overview.
- Reference: a guide image that is not a layer. See Reference image.
#On a phone
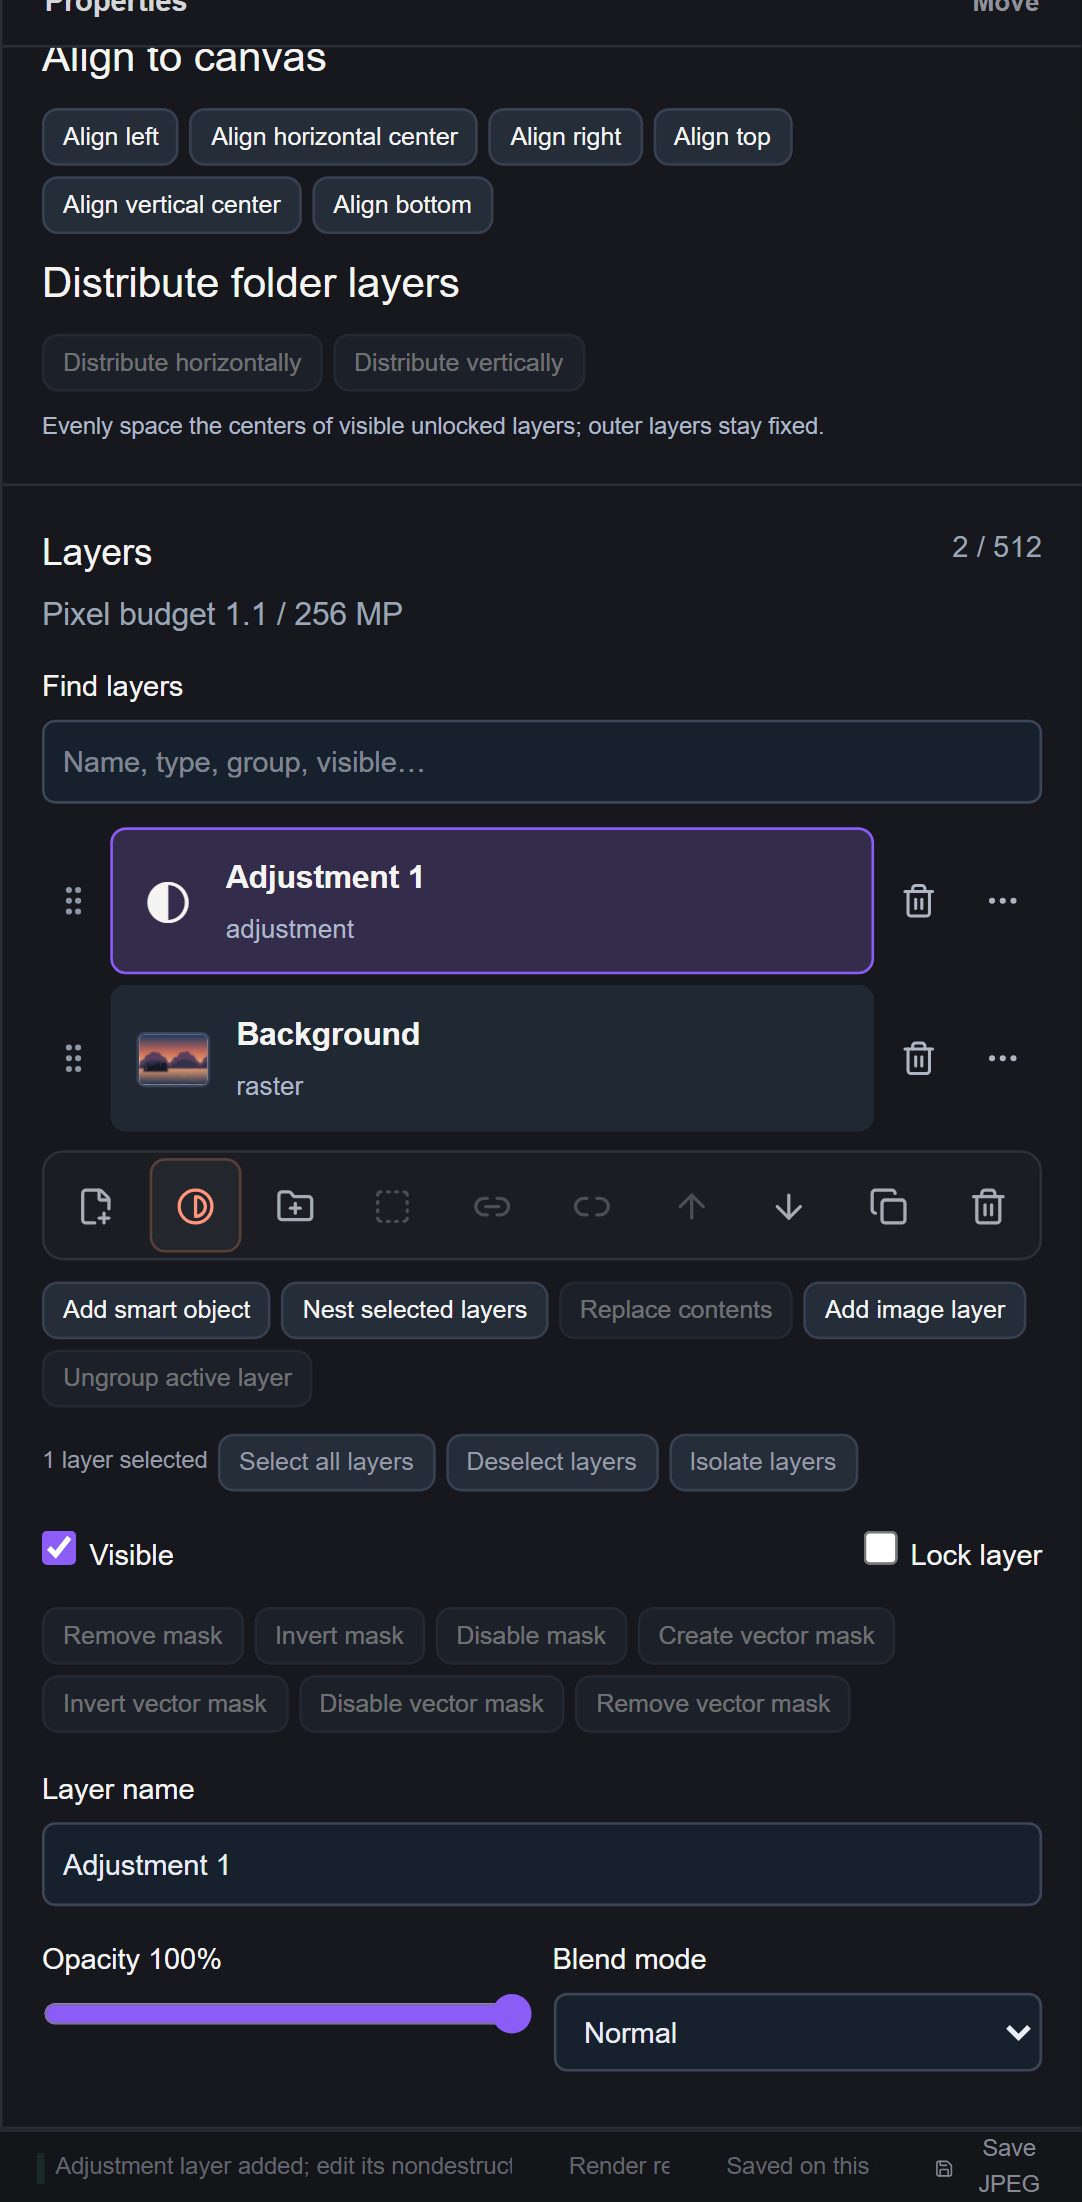
On a phone, open the properties sheet at the bottom of the screen to reach the Layers panel. Row buttons are always visible and larger. Long-press a row to open its menu, or long-press the grip handle at the left of a row and drag to reorder.
Still stuck? See Troubleshooting or report a problem.