
Correct perspective with Perspective Crop
Crop a skewed surface, such as a sign, document or building front, and flatten it into a straight-on rectangle with the Perspective Crop tool.
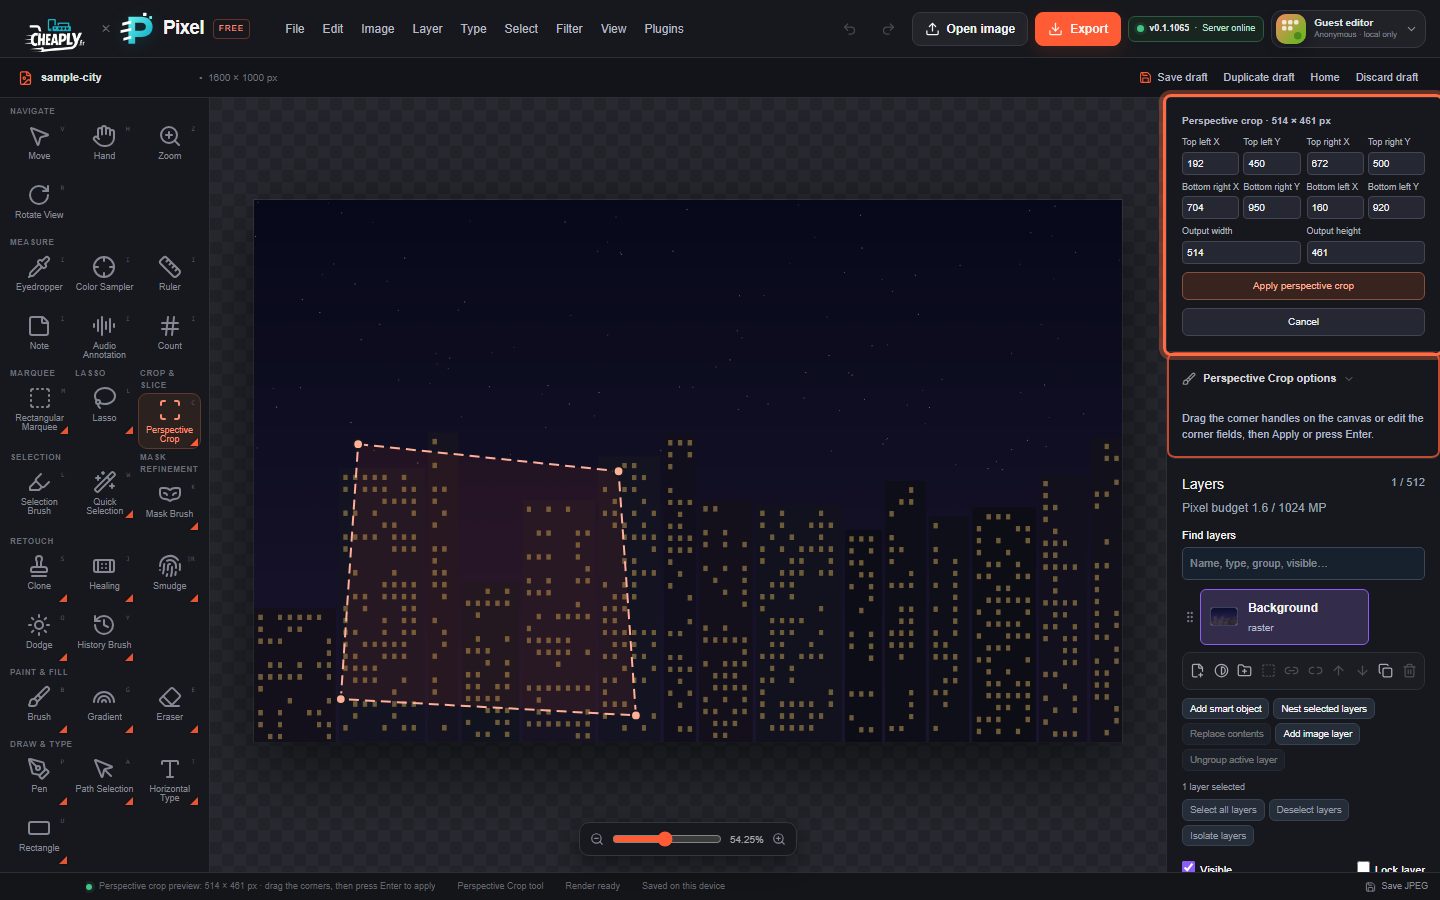
The Perspective Crop tool crops to four corners you place and stretches that area into a rectangle. Use it to straighten a photo of a document, a painting on a wall or a building front taken at an angle.
It is in the Crop toolbar family: press and hold the Crop button, or right-click it, and choose Perspective Crop, or choose Image > Perspective Crop….
#Crop with perspective
- Choose Perspective Crop.
- Mark the surface in one of two ways:
- Click its four corners, in any order. The tool sorts them clockwise from the top-left.
- Drag a rectangle, then move its corners.
- Drag any corner handle on the canvas onto the matching corner of the surface. A move that would fold the shape or make it concave is ignored.
- Fine-tune in the Perspective crop panel in the sidebar: Top left X/Y, Top right X/Y, Bottom right X/Y, Bottom left X/Y, plus Output width and Output height. The output size is suggested from the average lengths of opposite sides.
- Click Apply perspective crop or press Enter. Click Cancel or press Esc to leave the image unchanged.
The result replaces the document with the corrected rectangle, as one undo step.
#Limits
- The output is limited to 16,000 pixels on a side and 16 megapixels in total.
- Pixels are resampled with nearest-neighbour sampling, which keeps the result predictable but can look slightly jagged on strong corrections. Avoid enlarging small areas a lot.
- It flattens a single flat surface. It cannot correct lens distortion or curved surfaces; for those, see Lens correction.
Still stuck? See Troubleshooting or report a problem.