
Paint with the Brush tool
Paint soft or hard strokes with the Brush tool, set size, hardness, opacity, flow and blend mode, and paint inside a selection.
The Brush tool paints with the foreground colour (the Color well at the bottom of the toolbar). Each stroke is one step in the history, so Ctrl+Z removes the whole stroke.
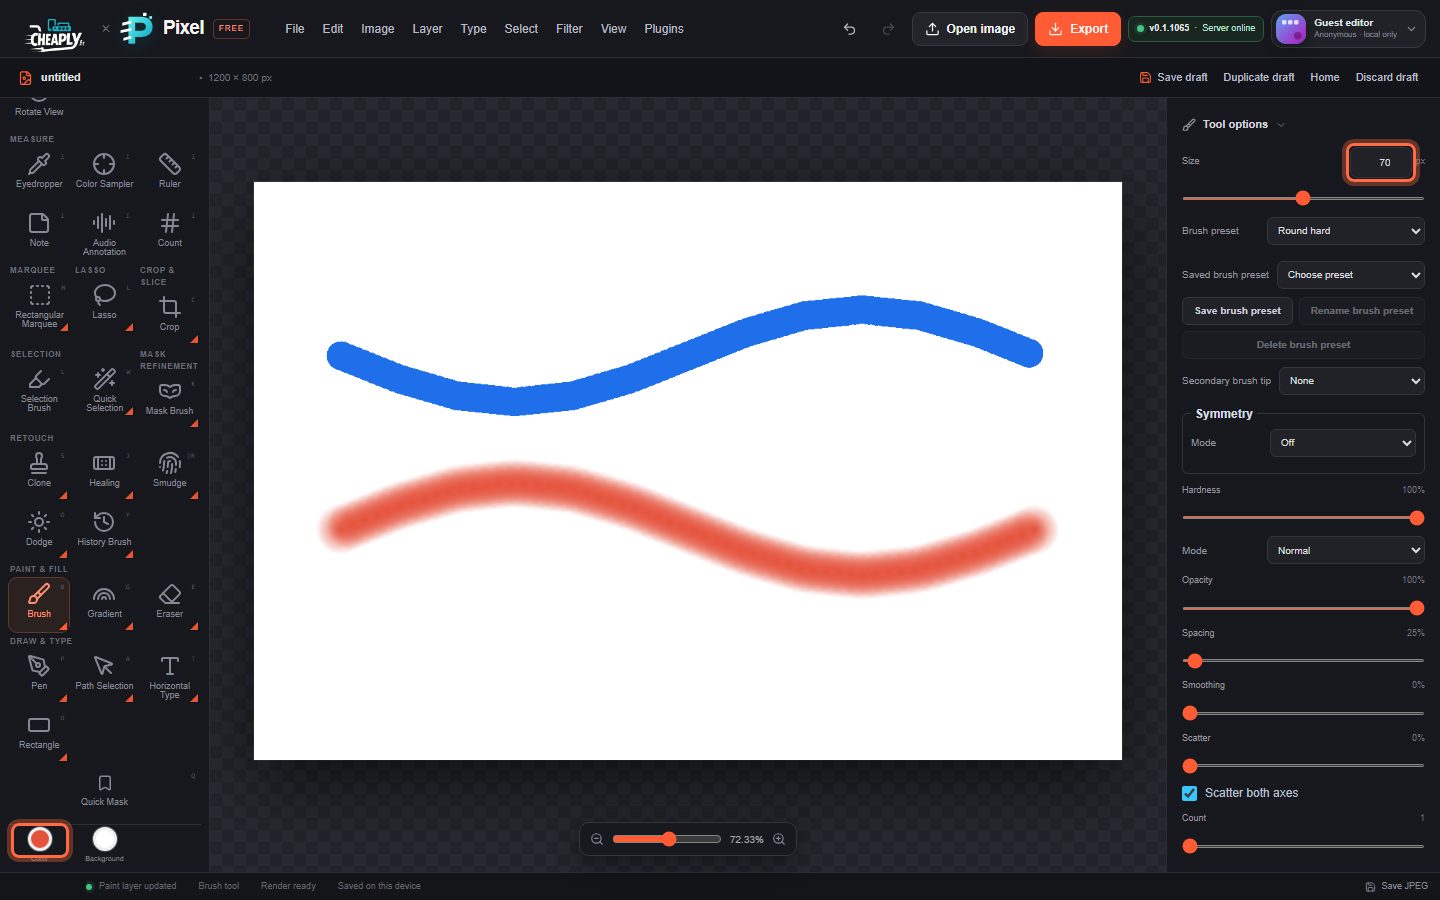
#Paint a stroke
- Choose the Brush tool in the Paint & Fill group of the toolbar, or press B. Press B again to cycle through Brush, Pencil, Color Replace and Mixer Brush.
- Choose a colour in the Color well (see Choose colours).
- In Tool options in the sidebar, set Size and Hardness.
- Select the layer you want to paint on in the Layers panel. The Brush paints on visible, unlocked pixel layers.
- Drag on the canvas.
With a mouse, each stroke paints at full size and opacity. With a pen or touch screen, you can map pressure to size or opacity (see Pressure below).
#Size
Size is the brush diameter in pixels, from 1 to 5,000 px. Type a value in the field or drag the slider. The slider is logarithmic, so small sizes are easy to set precisely and the far end reaches very large brushes.
Press ] to make the brush bigger and [ to make it smaller. The step grows with the size: 1 px below 10 px, 5 px up to 100 px, and up to 500 px steps for the largest brushes. These keys work for every painting and retouching tool.
#Main options
| Option | What it does |
|---|---|
| Brush preset | A built-in tip: Round hard, Round soft, Pencil or Ink angled. It sets size, hardness, spacing, angle and roundness. See Brush presets. |
| Hardness | 100% gives a crisp edge; 0% fades smoothly from the centre to the edge. |
| Mode | How the stroke blends with the pixels already on the layer (see below). |
| Opacity | The most a single stroke can cover. Overlapping parts of one stroke never build up past this value; a new stroke can darken further. |
| Flow | How much paint each dab lays down. Low Flow builds coverage gradually as you paint over the same spot in one stroke, up to the Opacity limit. |
| Spacing | Distance between dabs as a percentage of the diameter (1–1,000%). The default 25% gives a continuous line; large values give separate dots. |
| Smoothing | Steadies the stroke so shaky mouse or finger movement draws a smoother line. 0% follows the pointer exactly. |
More options, such as scatter, jitter, colour dynamics, texture and tip angle, are explained in Brush settings and dynamics.
#Blend mode
Mode blends the stroke with the existing pixels of the layer. The choices are Normal, Darken, Multiply, Color Burn, Lighten, Screen, Color Dodge, Overlay, Soft Light, Hard Light, Difference, Exclusion, Hue, Saturation, Color and Luminosity.
- The mode compares the stroke with the layer as it was before the stroke started, so a Multiply stroke does not darken itself where it overlaps.
- On transparent pixels a blend mode paints like Normal. Modes are most useful on a layer that already has paint or a photo on it.
- The mode is saved with brush presets. It is separate from the layer's own blend mode in the Layers panel (see Blend modes and opacity).
#Pressure
Pressure options apply to pen and touch input. Mouse input always paints at full pressure.
| Option | What it does |
|---|---|
| Pressure affects size | Light pressure paints a thinner line. |
| Pressure affects opacity | Light pressure paints a fainter line. |
| Pressure curve | Linear, Soft (more response) makes light pressure count more, Firm (less response) needs a firmer press. |
Both pressure options are off by default. When either is on, lifting a pen until it reports almost no pressure paints nothing.
#Paint inside a selection
When a selection is active, the Brush only changes pixels inside it, and a feathered selection edge receives proportionally less paint. Make the selection first (see Selection basics), then paint across its edge freely.
#Paint along a path
To stroke a path you drew with the Pen tool, use Layer > Stroke Path with Brush…. See Stroke a path.
#Related tools
- Pencil tool for hard, aliased lines.
- Eraser tools to remove paint.
- Paint symmetry to mirror strokes as you paint.
- Silk strands for ribbons of fine twisting lines.
- Tool presets save every option of a tool at once.
Still stuck? See Troubleshooting or report a problem.