
Filter Gallery and quick filters
Give a layer a quick look with the Original, Vivid, Mono, Warm and Cool presets from the Filter menu, the Filter Gallery or the Quick filters panel.
Quick filters are five one-click looks: Original, Vivid, Mono, Warm and Cool. They are stored with the layer and stay editable, and your original pixels are kept. You can apply them from the top of the Filter menu, from Filter > Filter Gallery… or from the Quick filters section of the Filters panel.
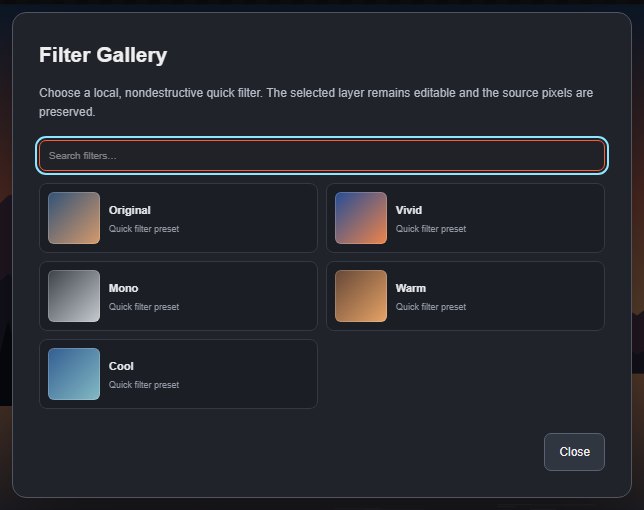
#The presets
| Preset | What it does |
|---|---|
| Original | Removes the quick filter, so the layer shows its own colours. |
| Vivid | Raises saturation strongly and adds a little contrast. |
| Mono | Black and white with a little extra contrast. |
| Warm | A light sepia tone with slightly richer colour. |
| Cool | Turns every hue slightly (by 18°) and lowers saturation a little, for a cooler, muted look. |
A layer has one quick filter at a time; choosing another replaces it. Quick filters have no settings.
#Use the Filter Gallery
- Select a visible, unlocked layer.
- Choose Filter > Filter Gallery….
- Type in Search filters… to narrow the list, if you like.
- Click a card to apply it. The dialog closes.
- Click Close or press Esc to leave without changing anything.
The Filter Gallery currently lists only the five quick filter presets. The other filters are in the Filter menu.
#Use the Quick filters panel
Open the Filters panel in the properties sidebar. The Quick filters section at the top shows the five presets as swatches; the active one is highlighted. Click a swatch to apply it.
#Quick filters and other filters
A quick filter is separate from the live filter in Filter effects, so a layer can have both: for example Mono plus a Gaussian Blur…. Clearing the Filter effects section does not remove the quick filter; choose Original for that.
Still stuck? See Troubleshooting or report a problem.