
Adjustment Brush
Paint an adjustment layer's correction into, or out of, chosen parts of the image with the Adjustment Brush tool.
The Adjustment Brush paints where an adjustment layer applies. Use it to brighten only a face, desaturate only the background or warm only the sky. It edits the adjustment layer's mask: the adjustment settings stay editable, and no image pixels are changed.
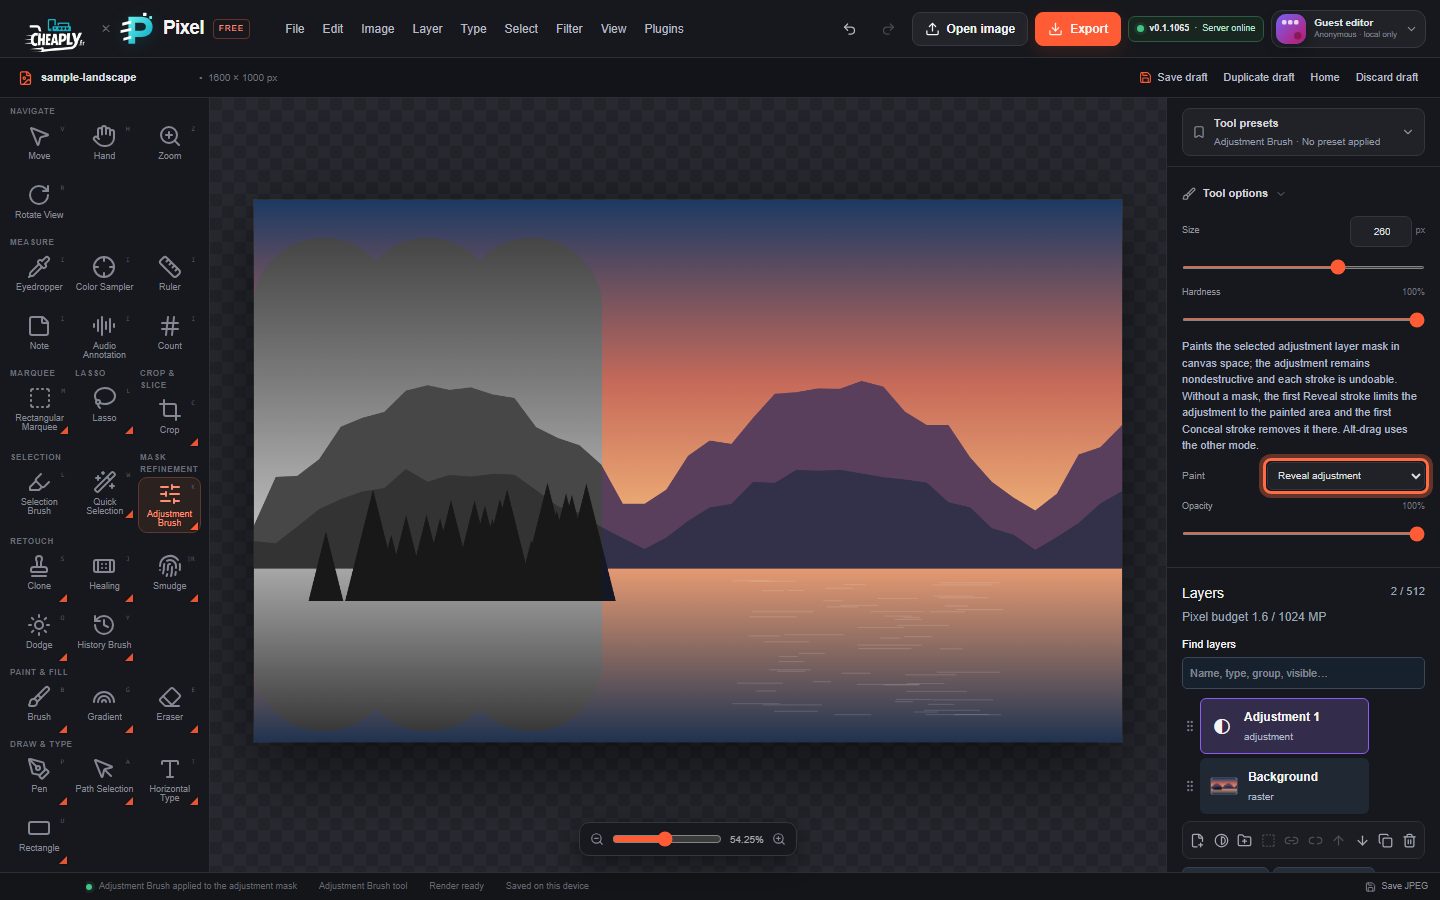
#Paint an adjustment into part of the image
- Add an adjustment layer: Layer > New Adjustment Layer.
- Set the correction in the Adjust selected layer panel, for example tick Black and White or raise Exposure. For now it applies to the whole image.
- Choose the Adjustment Brush tool. It is in the Mask Refinement group of the toolbar, with Mask Brush and Mask Eraser; press and hold (or right-click) that button to pick it, or press K repeatedly (it cycles through Frame, Mask Brush, Mask Eraser and Adjustment Brush).
- Make sure Paint is set to Reveal adjustment.
- Paint on the canvas. On a fresh adjustment layer, the first Reveal stroke limits the adjustment to the painted area; each further stroke adds to it.
#Paint an adjustment out of part of the image
To keep the adjustment everywhere except a few areas, set Paint to Conceal adjustment before your first stroke. The first Conceal stroke removes the adjustment where you paint and keeps it everywhere else.
Hold Alt while you drag to use the other mode for that stroke, for example to fix an edge you painted too far.
#Options
| Option | What it does |
|---|---|
| Size | Brush diameter in pixels. Type a value or drag the slider. |
| Hardness | 100% gives a crisp edge; lower values give a soft, feathered edge. |
| Paint | Reveal adjustment paints the adjustment in; Conceal adjustment paints it out. |
| Opacity | Lower values reveal or conceal partially, so the adjustment applies at reduced strength. |
A pen or touch screen with pressure support varies the stroke with pressure. Each completed stroke is one undo step.
#Good to know
- The tool only works on a visible, unlocked adjustment layer. On any other layer, the status bar asks you to select one.
- The mask the brush creates is an ordinary layer mask. You can invert, disable or remove it with Invert mask, Disable mask and Remove mask in the Layers panel.
- To start from a selection instead of painting, make a selection and click Mask from selection with the adjustment layer selected, then refine the edges with the Adjustment Brush.
- To refine the mask of an image layer rather than an adjustment layer, use the Mask Brush and Mask Eraser (Mask brush tools).
Still stuck? See Troubleshooting or report a problem.