
Brush settings and dynamics
Shape the brush tip and vary each dab with scatter, count, size, angle, opacity and colour jitter, texture, dual tip and other brush options.
A brush stroke is a row of round or oval dabs. The options below change the shape of each dab and vary its position, size, angle, opacity and colour along the stroke. They appear in Tool options for the Brush, Pencil and Eraser; some are shared by other painting tools.
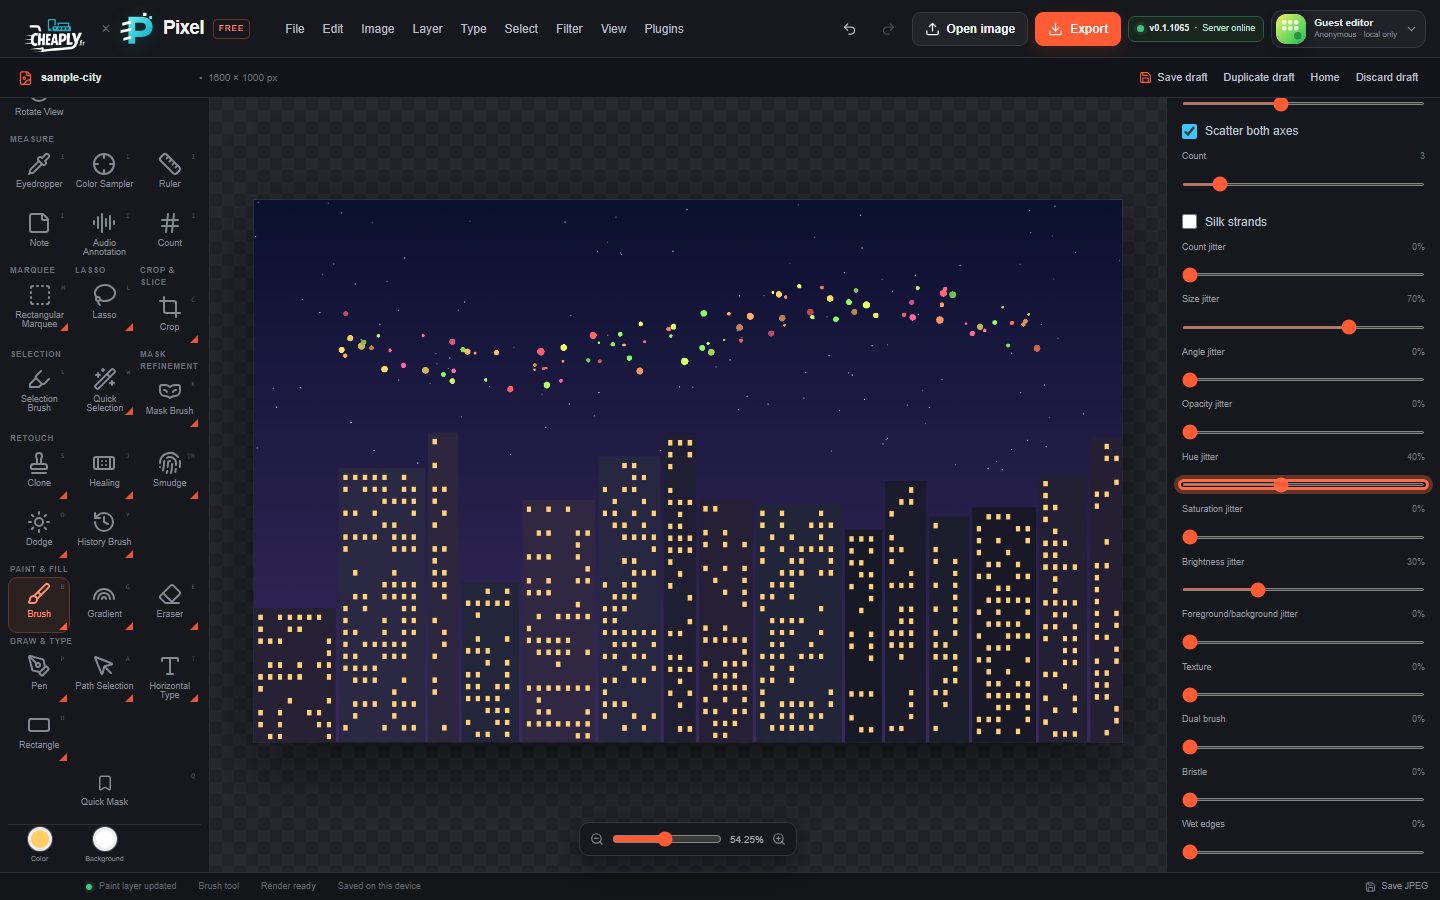
All variation is deterministic: it is calculated from the position of each dab rather than from random numbers, so the same stroke always gives the same pixels (for example after undo and redo). These are local approximations of common brush-engine behaviour, not a copy of any other application's engine.
#Tip shape
| Option | What it does |
|---|---|
| Brush preset | Built-in tips: Round hard, Round soft, Pencil, Ink angled. |
| Angle | Rotates the tip, from -180° to 180°. It only has a visible effect when Roundness is below 100%. |
| Roundness | 100% is a circle; lower values flatten the tip into an oval, like a calligraphy pen. |
| Flip tip horizontal / Flip tip vertical | Mirror the tip. A symmetric tip looks the same either way. |
| Spacing | Distance between dabs, 1–1,000% of the diameter. |
#Scatter and count
| Option | What it does |
|---|---|
| Scatter | Moves each dab away from the stroke path, up to 1,000%. At 100% a dab can move up to three quarters of the diameter. |
| Scatter both axes | On (default): dabs move in any direction. Off: dabs move only sideways, across the stroke. |
| Count | Places 1–16 dabs at each spacing step. Combine with Scatter to spray dots. |
| Count jitter | Varies the number of dabs per step around the Count value. |
#Shape jitter
| Option | What it does |
|---|---|
| Size jitter | Makes some dabs smaller, down to (100% − jitter) of the size. |
| Angle jitter | Turns each dab by up to ±180° × jitter. Visible on oval tips. |
| Opacity jitter | Makes some dabs fainter. |
#Colour dynamics
The Brush and Pencil can vary the colour of every dab. The Eraser ignores these options.
| Option | What it does |
|---|---|
| Hue jitter | Shifts the hue of each dab by up to ±180° × jitter. |
| Saturation jitter | Makes each dab more or less saturated. |
| Brightness jitter | Makes each dab lighter or darker. |
| Foreground/background jitter | Mixes each dab part of the way from the foreground colour towards the background colour. |
Colour jitter never moves a dab, so turning it on keeps the same shapes. White, black and greys have no hue, so Hue jitter alone does not change them; add Saturation jitter or Foreground/background jitter to tint them.
#Texture and wet effects
These options change the opacity inside each dab. They are simple local effects, not a simulation of real paint.
| Option | What it does |
|---|---|
| Texture | A paper-grain pattern fixed to the canvas that makes some pixels of each dab fainter. |
| Secondary brush tip + Dual brush | Choose a Secondary brush tip and raise Dual brush to stamp a second tip at the same place; the amount sets its opacity. With the tip set to None, Dual brush varies dab opacity on its own. |
| Bristle | Adds streaky opacity variation, like the hairs of a brush. |
| Wet edges | Keeps the edge of each dab strong and makes its centre lighter, like watercolour. |
| Build-up | Keeps the centre and reduces paint towards the edge of each dab. |
#Pressure
Pressure affects size, Pressure affects opacity and Pressure curve work with a pen or touch screen; a mouse always paints at full pressure. See Paint with the Brush tool for details. The Pencil shows only the pressure curve.
#Where settings are kept
Brush settings are part of the editor's settings: they are kept in your draft and in project files, and they apply to future strokes only. Painting with new settings never changes strokes you already made.
To reuse a combination, save it as a brush preset (see Brush presets) or as a whole-tool preset (see Tool presets).
Still stuck? See Troubleshooting or report a problem.