
Sharpen filters
Bring out detail with Sharpen, Sharpen More, Sharpen Edges, Smart Sharpen, Unsharp Mask, High Pass and the local AI Sharpen approximation.
Sharpening increases contrast along edges so a picture looks crisper. PixelForge's sharpen filters are live: they stay editable with the layer and never overwrite your original pixels. See Filters overview for the basics.
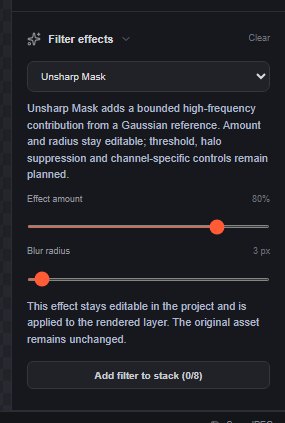
#Apply a sharpen filter
- Select a visible, unlocked layer.
- Choose a sharpen command from the Filter menu. Sharpen, Sharpen Edges, Sharpen More, Smart Sharpen… and Unsharp Mask… are under the Sharpen heading; High Pass… is under Other; AI Sharpen… is near the top of the menu.
- Open the Filters panel and adjust Filter effects.
Zoom to 100 % (View > Actual size) to judge sharpening; at smaller zoom levels the effect is hard to see.
#The filters
All of them have Effect amount (0–100 %, how strong the sharpening is). All except Sharpen also have a radius slider (Blur radius, 1–64 px, how wide the edges that get sharpened are). Small radii (1–3 px) bring out fine detail; large radii add punchy local contrast but can create bright or dark halos.
| Filter | Default | What it does |
|---|---|---|
| Sharpen | 70 % | A one-click sharpen with a fixed 3 × 3 pixel kernel: each pixel is contrasted against its four direct neighbours. It has no radius; only Effect amount changes the result. |
| Unsharp Mask… | 70 %, 6 px | The classic unsharp mask: adds back the difference between the layer and a blurred copy of it, with an adjustable Blur radius. There is no Threshold control. |
| Sharpen More | 70 %, 6 px | Applies the unsharp mask step twice for a stronger result. |
| Sharpen Edges | 70 %, 6 px | Weights the sharpening towards edges and leaves smooth areas mostly alone. |
| Smart Sharpen… | 70 %, 6 px | Compares the layer with an edge-preserving blur, which limits sharpening on flat areas such as skies and skin. |
| High Pass… | 85 %, 3 px (High Pass radius) | Turns the layer into neutral grey with only its edges showing. See the tip below. |
#AI Sharpen
Filter > AI Sharpen… is a private, local approximation. It does not use an AI model and does not upload anything. It boosts fine brightness detail while keeping the original colours, and leaves smooth tones alone.
| Option | Range | Default | What it does |
|---|---|---|---|
| Effect amount | 0–100 % | 100 % | Mix with the original. |
| Edge threshold | 0–255 levels | 22 / 255 | Brightness differences below this level are not sharpened, which protects smooth areas. Higher values sharpen only stronger edges. |
| Blur radius | 1–64 px | 2 px | Size of the detail being boosted. Values above 6 px give the same result as 6 px. |
#Sharpen with High Pass
- Duplicate the layer (see Add, duplicate and arrange layers).
- On the copy, choose Filter > High Pass… and set High Pass radius to 1–4 px.
- Set the copy's blend mode to Overlay or Soft Light (see Blend modes and opacity).
- Lower the copy's opacity to tone the effect down.
#Limits
These are local approximations. They have no threshold or halo-suppression controls (except AI Sharpen's edge threshold), and they work on 8-bit colour.
Still stuck? See Troubleshooting or report a problem.