
Fill a selection
Fill a selection or a whole layer with a colour or a repeating pattern, including the Mesh fishnet, using Edit > Fill… and the quick-fill shortcuts.
Edit > Fill… fills the selection on the active layer with a colour or a repeating pattern. Without a selection, it fills the whole layer. To fill an area of similar colour with a click, use the Paint Bucket instead.
Fill works on a visible, unlocked raster (pixel) layer. For text, shape or adjustment layers, add a new paint layer first (Layer > New Paint Layer).
#Fill with a colour
- Make a selection (or none, to fill the whole layer) and select the layer to fill.
- Choose Edit > Fill… or press Shift+F5.
- Choose Contents: Foreground Color, Background Color, Color… (pick any colour), Black, White or 50% Gray.
- Optionally set Mode (a blend mode) and Opacity (%) (a whole number from 1 to 100).
- Click Fill, or press Enter to accept the defaults.
#Quick fills
| Command | Shortcut |
|---|---|
| Edit > Fill with Foreground Color | Alt+Backspace (Option+Delete on Mac) |
| Edit > Fill with Background Color | Ctrl+Backspace (⌘+Delete on Mac) |
Quick fills use 100% opacity and Normal mode, and respect the selection in the same way.
#Fill with a pattern
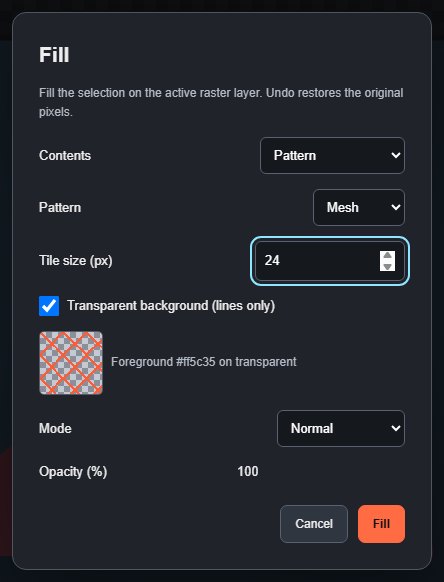
- In Contents, choose Pattern.
- Choose a Pattern: Checker, Stripes, Dots, Grid, Diagonal or Mesh, or a pattern you defined from a selection with the Pattern Stamp (see Patterns).
- For the built-in patterns, set Tile size (px), a whole number from 4 to 128.
- Leave Transparent background (lines only) ticked to draw only the pattern's lines in the foreground colour, so the gaps leave the layer untouched. Untick it to fill the gaps with the background colour.
- Click Fill.
The preview swatch shows one tile with your current colours. The dialog starts on the Pattern Stamp's current pattern and tile size. Patterns line up with the layer's top-left corner, so repeated fills join seamlessly. Patterns defined from a selection are used at their own size and colours.
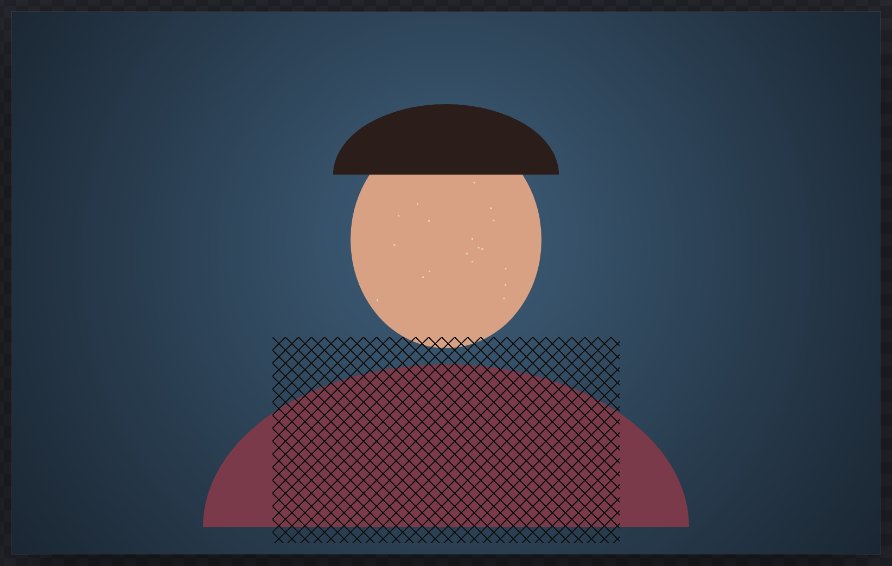
Mesh is a diamond (fishnet) lattice of lines along both diagonals, useful for netting, fences or textile effects. Line thickness grows with the tile size.
#Good to know
- A feathered or partly selected edge fades the fill in proportion; unselected pixels never change.
- Each fill is one undo step.
- If the selection covers no pixels, Fill does not open and shows No pixels are selected.
- Fill options are not saved with the document; the dialog starts fresh each time.
Still stuck? See Troubleshooting or report a problem.