
Fade an edit
Weaken the last pixel edit or the filter you just applied with Edit > Fade…, and change a filter's fade later in the Filters panel.
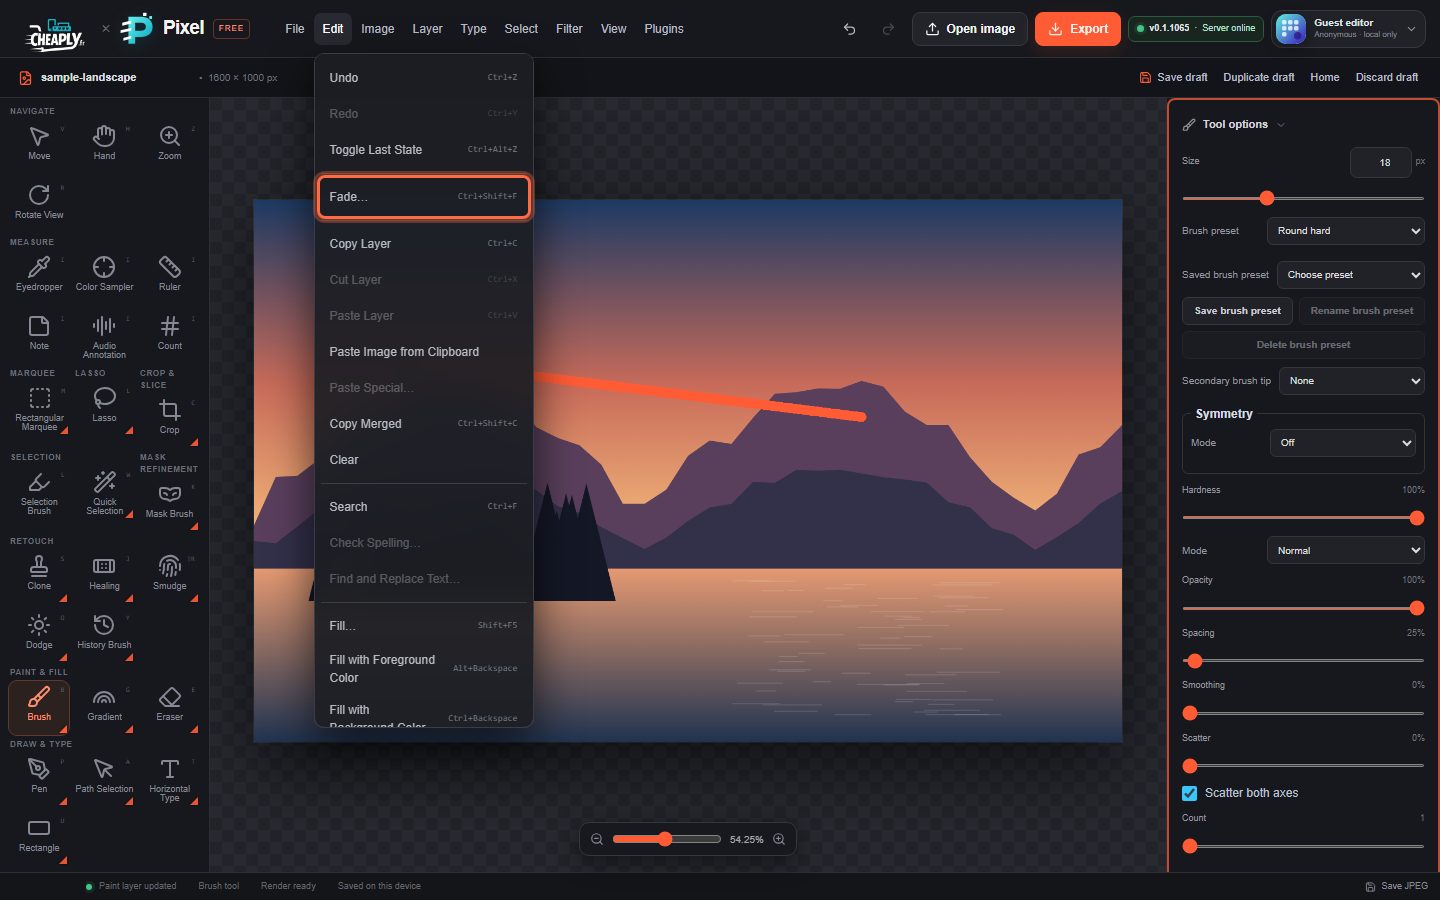
Edit > Fade… (Ctrl+Shift+F) blends the result of your last edit with how the layer looked just before it. At 100 % the edit stays as it is; at 0 % the layer goes back to its previous state; values in between give a partial edit. Use it right after a brush stroke, a fill or another change that rewrote the layer's pixels, or right after you apply a filter.
#Fade the last edit
- Make an edit on a raster layer, for example a brush stroke.
- Straight away, choose Edit > Fade….
- The Fade dialog opens with Fade opacity at 50 %. Type a value from 0 to 100.
- Click Fade or press Enter. Cancel or Esc leaves the edit as it is.
The status bar confirms, for example "Fade applied at 50%; undo restores the original edit". The fade is a new History step: undo it to get the full edit back, undo again to remove the edit.
#Fade a filter
Most filters in PixelForge are live: they are drawn on top of the layer without changing its pixels (see Filters overview). Fade works with them too, and the fade stays editable.
- Apply a filter from the Filter menu, or change a live filter's settings.
- Straight away, choose Edit > Fade….
- A dialog named after the filter opens, for example Fade Gaussian blur, with Fade opacity at 50 %. Type a value from 0 to 100 and click Fade.
The status bar confirms, for example "Gaussian Blur faded to 40%; edit it under Filter effects or undo to restore". The value is stored on the filter: at 0 % the layer looks as it did before the filter, at 100 % the filter shows in full.
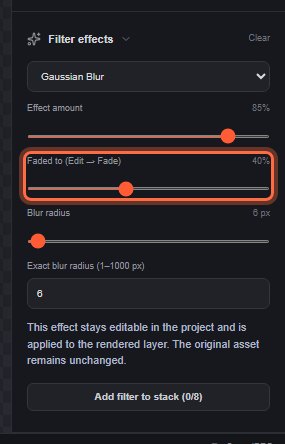
To change the fade later, open the Filters panel: the Filter effects section shows a Faded to (Edit → Fade) slider under Effect amount. Drag it to 100 % to remove the fade. The fade is one History step, so Ctrl+Z also removes it. Choosing a different filter drops the fade, and a recorded action repeats it.
Effect amount and the fade both weaken a filter. Use either; the fade is handy when you want to judge the filter at full strength first and then tone it down.
#When Fade is available
Fade compares the active layer with the same layer one History step earlier. It is greyed out when:
- there is no earlier History step;
- the last step did not change the active layer's pixels or its live filter, for example straight after another Fade;
- for a pixel edit, the active layer is not a raster layer (text, shape and adjustment layers cannot be faded), or it did not exist or was not a raster layer in the previous step;
- Quick Mask mode is on.
To fade a filter, the layer must be visible and unlocked; otherwise the status bar says "Unlock and show this layer before fading its filter". If the previous and current pixels have different sizes, Fade shows an error and changes nothing.
Fade also works after Filter > Vanishing Point…, which rewrites the layer's pixels.
Still stuck? See Troubleshooting or report a problem.