
Camera Raw Filter
Recover highlights and shadows, fix white balance and tune colour intensity on a layer with Filter > Camera Raw Filter…, a local, editable tonal correction.
Filter > Camera Raw Filter… gives you five photo controls in one dialog: Highlights, Shadows, Temperature, Tint and Clarity. The correction is stored with the layer, so you can open the dialog again later and change it, and the original pixels are kept. Everything is calculated in your browser; nothing is uploaded.
It works on ordinary images. It does not open camera RAW files, load camera profiles or process in linear light.
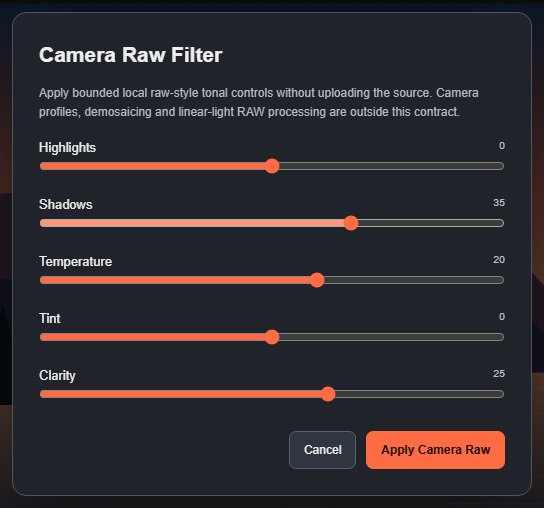
#Use the Camera Raw Filter
- Select a visible, unlocked raster layer or smart object. (The command is greyed out for other layers.)
- Choose Filter > Camera Raw Filter….
- Move the sliders.
- Click Apply Camera Raw, or Cancel to close without changes.
The canvas updates when you click Apply Camera Raw, not while you drag. To fine-tune, open the dialog again: it starts from the values you applied last. Each apply is one undo step.
#Options
All sliders run from −100 to 100; 0 means no change.
| Slider | What it does |
|---|---|
| Highlights | Negative values darken bright areas to recover detail; positive values brighten them. |
| Shadows | Positive values lift dark areas; negative values deepen them. |
| Temperature | Positive values warm the picture (towards yellow); negative values cool it (towards blue). |
| Tint | Corrects a green or magenta cast. Positive values add magenta; negative values add green. |
| Clarity | Midtone local contrast. Each pixel is compared with the average brightness of a large area around it (about 2.5 % of the longer side, 2–48 px). Positive values strengthen that difference, so edges and texture in the midtones stand out; negative values soften it for a hazier look. Blacks, whites, flat areas and colours (hue) are left as they are. |
Fully transparent pixels are left alone.
#How it relates to other corrections
The Camera Raw values are stored with the layer's photo adjustments, together with Exposure, Vibrance and Black and White from the Adjust panel, and they work together. They are not a live filter in Filter effects, so they cannot be stacked or limited to a selection. To correct only part of a picture, use the Adjustment brush or an adjustment layer with a mask.
Still stuck? See Troubleshooting or report a problem.