
Clipping masks
Clip a layer to the layer below so it only shows inside that layer's shape, for example a photo inside a circle or text.
A clipping mask shows a layer only where the layer directly below it has pixels. The lower layer is the base: its shape decides what is visible, while the clipped layer supplies the content. Use it to put a photo inside a shape or inside text, or to colour only one layer.
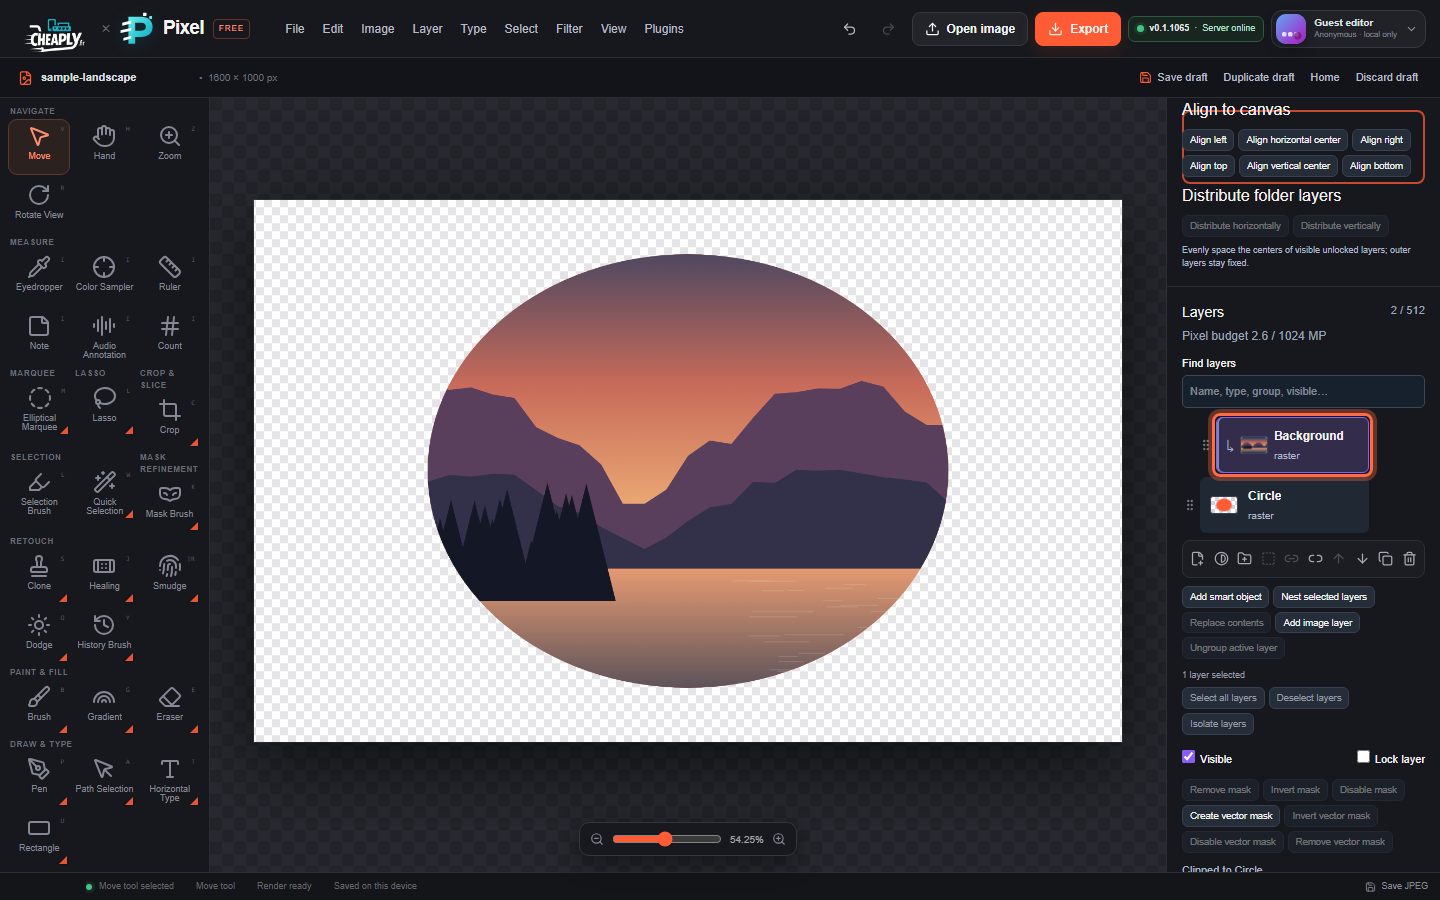
#Create a clipping mask
- Put the layer to clip directly above the base layer.
- Select the upper layer.
- Click Create clipping mask under the layer list, choose Layer > Create Clipping Mask, or choose Create Clipping Mask in the row menu.
The clipped layer is indented with ↳ in the list, and the Layers panel shows "Clipped to" and the base name. Both layers must be visible and unlocked.
To clip several layers to the same base, clip each one in turn from the bottom up. Together they form a clipping group, and every clipped layer uses the shape of the base.
#What can be clipped
- The clipped layer must be an image, paint or fill layer, or a smart object.
- The base can be an image or paint layer, a smart object, a text layer, a shape or a path. Text and shape bases stay editable: change the text or the shape and the clipped content follows.
- Adjustment layers cannot be clipped and cannot be a base.
- The base must be directly below the clipped layer and in the same folder.
#Release a clipping mask
Select the clipped layer and click Release clipping mask, choose Layer > Release Clipping Mask, or choose Release Clipping Mask in the row menu. The layer shows in full again.
#Move clipping groups
- Moving the base moves its clipped layers with it.
- Arrange commands step other layers past a whole clipping group, so they never land inside it by accident.
- Dragging a clipped layer out of its group releases only that layer, and the status bar names it.
- Dragging an image or smart object layer between a base and its clipped layers adds it to the group as a clipped layer. The drop hint says "Drop into clipping group of" and the base name.
- New layers added while a clipped layer is selected join its clipping group.
If you delete the base, the lowest clipped layer becomes the new base for the layers above it.
Still stuck? See Troubleshooting or report a problem.