
Paths and work paths
Understand path layers and work paths, turn a selection or text into a path, and combine shapes with union, subtract, intersect and exclude.
In PixelForge every path is a layer in the Layers panel. There is no separate Paths panel: you select, hide, reorder and delete paths like any other layer.
#Path layers and work paths
- A path layer is created by the Pen tools in Shape mode, the Custom Shape tool, and the commands below. It can have a fill and an outline.
- A work path is a path layer created with Pen mode set to Path (work path, no fill). It is named "Work Path 1", "Work Path 2" and so on, and is drawn as a thin 1 px line in the foreground colour so you can see and select it. Use it as a guide for Stroke a path, text on a path or a vector mask.
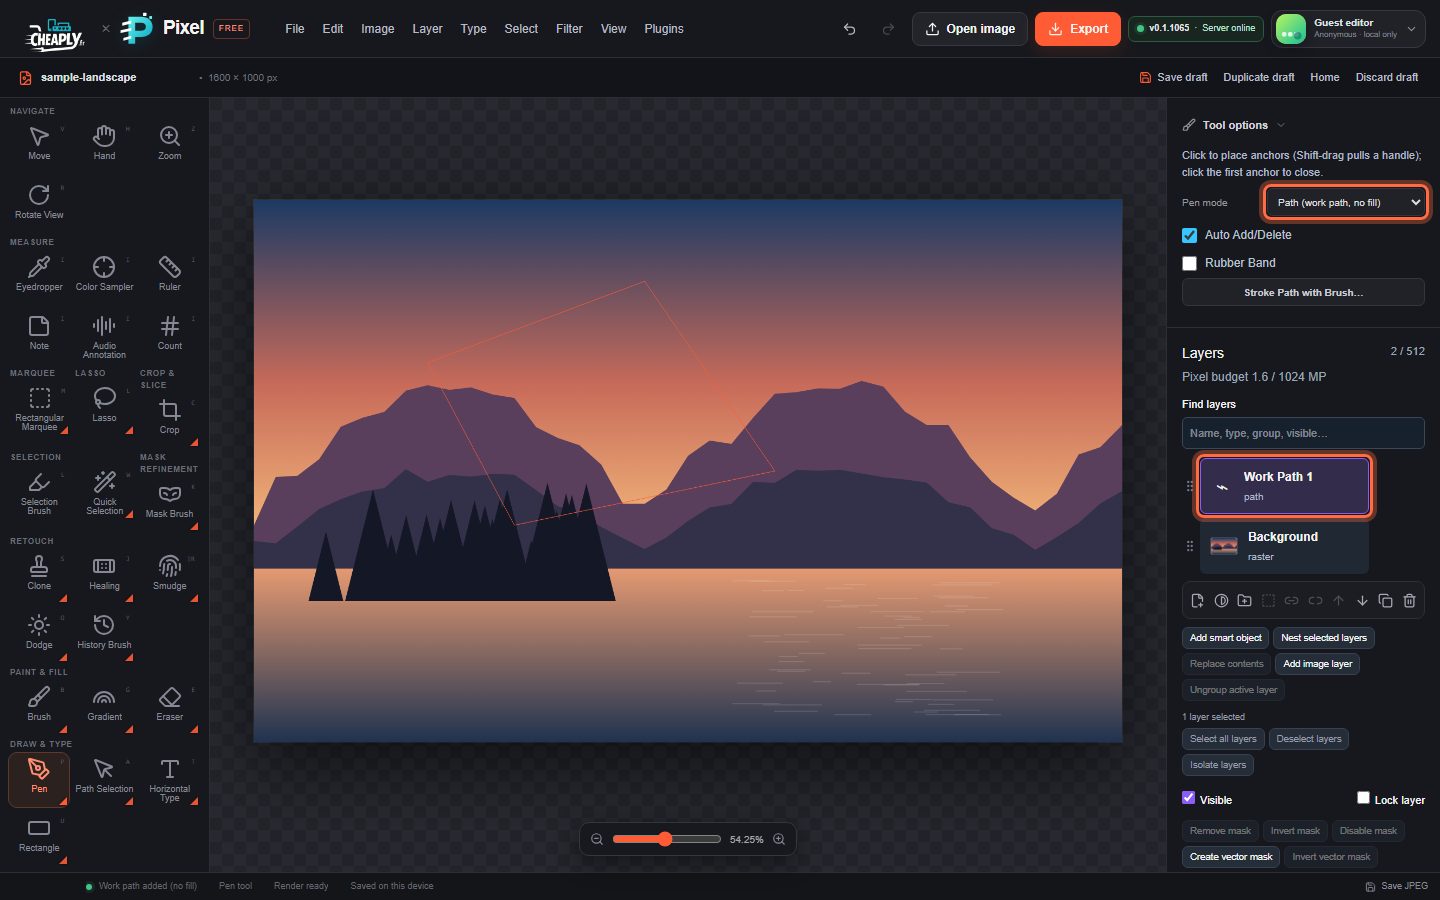
A work path is still a normal layer, so its line appears in exports. Hide the layer, or give it a fill or outline in the Layers panel (Fill, Stroke, Path stroke width, Fill color, Stroke color) to turn it into artwork.
#Make a path from a selection
- Make a selection (see Selection basics).
- Choose Type > Create Work Path.
The outline of the selection is traced into a new path layer you can edit with Direct Selection. The selection and your other layers do not change. Separate areas and holes are kept as separate contours.
The tracing follows the pixel edge of the selection, so curved edges become many short straight segments.
#Turn text into a shape
Select a type layer and choose Type > Convert to Shape. The type is traced into a path layer that replaces it, keeping the layer's position in the stack, visibility, opacity and blend mode. The text is no longer editable as text; undo brings it back.
Like Create Work Path, this traces the rendered letters, so the outline approximates the font's curves rather than copying them exactly.
#Combine shapes
Layer > Combine Shapes merges overlapping shapes into one path layer:
| Command | Result |
|---|---|
| Union | The combined outline of all shapes. |
| Subtract Front Shape | The bottom shape with the shapes above it cut out. |
| Intersect | Only the area where all the shapes overlap. |
| Exclude Overlapping Shapes | Everything except the overlapping areas. |
- In the Layers panel, select two to eight shape layers (closed paths, rectangles, ellipses or polygons). They must be visible, unlocked and in the same group.
- Choose a Layer > Combine Shapes command.
The selected layers are replaced by one editable path layer in the same place in the stack. Open paths, type, pixel layers and shapes in different groups cannot be combined, and an intersection that leaves nothing changes nothing.
#Save a path for later
Edit > Define Custom Path… saves the selected path layer as a preset you can add again or draw as a custom shape. See Custom shapes.
#Copy a shape as SVG or CSS
Layer > Copy SVG copies the selected path, rectangle, ellipse or polygon as SVG code. Layer > Copy CSS copies the selected shape, path or type layer as a CSS rule. Paste the result into a web page or code editor. See also SVG import and export.
Still stuck? See Troubleshooting or report a problem.