
Lens Correction and Adaptive Wide Angle
Make manual radial corrections around a point with Filter > Lens Correction… and Filter > Adaptive Wide Angle…, and understand their limits.
Lens Correction… and Adaptive Wide Angle… bend the pixels inside a circle around a centre point outwards or inwards. They are manual corrections: PixelForge does not read lens profiles or camera data, does not correct colour fringes (chromatic aberration) and does not detect lines for you. Both are live filters, so you can adjust or remove them later.
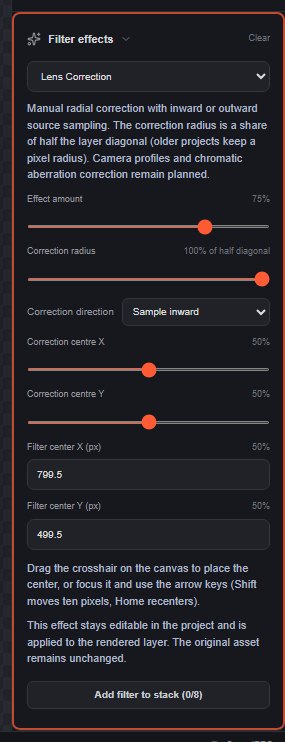
The Correction radius is a share of half the layer's diagonal (the distance from the middle to a corner), so the correction scales with the image. At 100 %, the default, a correction centred in the middle reaches every corner; lower it to correct only a smaller circle around the centre. Pixels outside the circle are untouched.
#Lens Correction
- Select a visible, unlocked layer.
- Choose Filter > Lens Correction….
- Open the Filters panel and adjust Filter effects.
- Drag the crosshair on the canvas to the middle of the area to correct.
| Option | Range | Default | What it does |
|---|---|---|---|
| Effect amount | 0–100 % | 75 % | Strength of the correction. |
| Correction radius | 2–100 % of half diagonal | 100 % | Radius of the circle that is corrected. |
| Correction direction | Sample inward, Sample outward | Sample inward | Sample inward takes pixels from closer to the centre, so the content inside the circle swells outwards. Sample outward does the opposite and draws the content in. |
| Correction centre X / Y | 0–100 % | 50 % | Position of the centre. You can also use Filter center X (px) / Filter center Y (px) or the crosshair. |
The correction is zero at the centre and at the edge of the circle and strongest in between, so there is no visible seam.
#Adaptive Wide Angle
Works like Lens Correction but lets you correct more horizontally or more vertically.
| Option | Range | Default | What it does |
|---|---|---|---|
| Effect amount | 0–100 % | 75 % | Strength of the correction. |
| Correction radius | 2–100 % of half diagonal | 100 % | Radius of the circle that is corrected. |
| Correction centre X / Y | 0–100 % | 50 % | Position of the centre, which stays fixed. |
| Horizontal line bias | 0–100 % | 50 % | How strongly the correction acts in the horizontal direction. |
| Vertical line bias | 0–100 % | 50 % | How strongly the correction acts in the vertical direction. |
Setting the two biases differently gives an oval-shaped correction instead of a round one. You cannot draw constraint lines.
Still stuck? See Troubleshooting or report a problem.