
Draw shapes
Draw editable rectangles, rounded rectangles, ellipses, lines, polygons and stars with the shape tools, and set their fill, stroke and size.
The shape tools draw vector shapes as their own layers. A shape stays sharp and editable: you can move, resize and recolour it at any time, and it is only turned into pixels when you export or rasterize it.
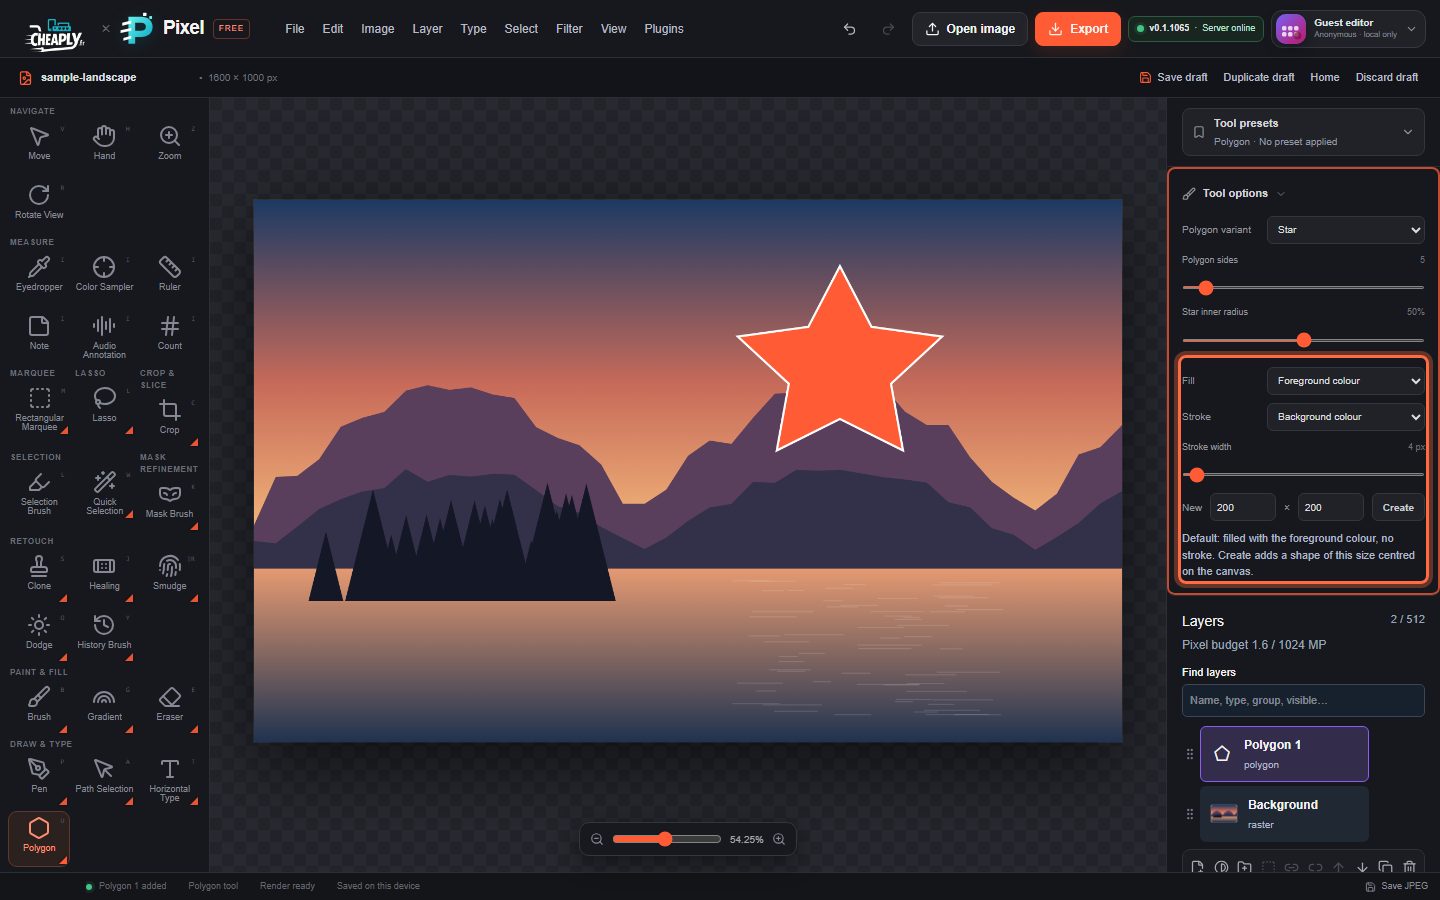
#Draw a shape
- Choose a shape tool from the Rectangle slot in the Draw & Type group of the toolbar. Press and hold (or right-click) the slot to see them all: Rectangle, Rounded Rectangle, Ellipse, Line, Polygon and Custom Shape. You can also press U to cycle forwards through the family and Shift+U to cycle backwards.
- Set the fill and stroke in Tool options (see below).
- Drag on the canvas. A preview of the real shape follows the pointer.
While dragging (all shapes except Line):
- Hold Shift to keep the proportions: a square, a circle or a regular polygon.
- Hold Alt (Option on Mac) to draw from the centre.
Each shape becomes a new layer named after the tool, such as "Rectangle 1" or "Ellipse 2", and the status bar says it was added. One Ctrl+Z removes it.
#Create a shape of an exact size
Under New, enter a width and height (1 to 16,000 px) and click Create. The shape is added in the centre of the canvas.
#Fill and stroke
All shape tools share the same options:
| Option | Choices |
|---|---|
| Fill | Foreground colour (default), Background colour, Custom colour or None |
| Stroke | None (default), Foreground colour, Background colour or Custom colour |
| Stroke width | 1 to 100 px (default 4 px) |
- By default shapes are filled with the foreground colour and have no outline.
- Set Fill to None and choose a Stroke to draw an outline only.
- If both Fill and Stroke are None, nothing is drawn and the status bar tells you so.
- The Line tool has no fill. It draws in the Stroke colour, or in the foreground colour when Stroke is None, at the Stroke width.
Change the colours with the colour wells at the bottom of the toolbar; see Choose colours.
#Tool-specific options
| Tool | Options |
|---|---|
| Rounded Rectangle | Corner radius (0 to 500 px). The radius is limited to half the shorter side, so a large radius draws a pill or a circle. |
| Polygon | Polygon variant: Polygon, Triangle or Star. Polygon sides sets the number of sides or points; stars also have a Star inner radius. |
#Edit a shape later
Select the shape layer in the Layers panel. Its properties include the fill colour and, for filled shapes, a layer stroke with its own colour and width. Rectangles, including those drawn with the Rectangle tool, have an editable corner radius. Use the Move tool or Free transform to move, resize or rotate the shape.
To combine overlapping shapes into one, see Paths and work paths.
Still stuck? See Troubleshooting or report a problem.